Starters
| ||||||||||||
|---|---|---|---|---|---|---|---|---|---|---|---|---|
|


Introduction[ | ]
The goal of this guide is for new players to be able to have basic feel for the units and decision making needed to be successful in the game without having to invest a lot of resources (gems/ quark points). The squad format I have used is my first formation I used in PvP and although it utilizes only Tier 1 Champs, it is easy to learn especially after going through tutorial and a few levels of the campaign. The Ghoul - although not part of the free squad you're given to start with - is a great unit and I recommend buying it as soon as you can.
Champ Stats[ | ]
Here is a table of the Tier 1 Champs in this guide:
| Champions | Race | Class | Health | Starting Energy | Energy Regen | Movement | PHS Defence | MAG Defence | Tech Defence |
|---|---|---|---|---|---|---|---|---|---|
 |
Human | Healer, Nuker | 1.8 | 0.95 | 2 | 265 | 5 | 25 | 5 |
 |
Undead | Fighter | 2.5 | 1 | 3 | 380 | 17 | 10 | 10 |
 |
Human | Fighter, Tank | 3.5 | 1 | 3 | 415 | 25 | 10 | 10 |
 |
Human | Ranged | 1.5 | 1 | 3 | 270 | 10 | 5 | 5 |
Reference: All Champ Stats
Strategies[ | ]

Placement[ | ]
This is totally up to you and your play style. Find what you are most comfortable with and what suits your units best. I personally, would sometimes switch the placement up for a mixed gameplay experience. Ask questions like:
- How many ranged units might I want in front to get them to a significant tile quickly?
- Which unit might I really want to have high survivability and where might it have that?
Focus[ | ]
Focus down on the enemy squishies (units with relatively low/ average health) as the game is won by the player that reaches the specified amount of kills. Also, try to direct your different sources of damage to the ones listed here:
- Physical damage on units that deal magic damage as they are generally more vulnerable to physical attacks.
- Magical damage on units that deal physical damage as they are generally more vulnerable to magical attacks.
Early Game[ | ]
Move your units to their maximum movement tile. When moving a unit, remember that it is always better to put them on an Energy Square ![]() even though there is no enemy unit within attack range. Control (and deny from your opponent) the Energy Squares
even though there is no enemy unit within attack range. Control (and deny from your opponent) the Energy Squares ![]() for the energy recovery advantage (the faster you recover energy, the more moves and attacks you can make!).
for the energy recovery advantage (the faster you recover energy, the more moves and attacks you can make!).
Late Game[ | ]
When a match is nearing an end (i.e. both players need only 1 kill left) and the kill scores are close, pay close attention to the health of the units on the field - whoever gets kills faster, wins. Focus units that are close to death in order to attain quicker kill scores while safeguarding your own units with dangerously low health away from enemy attacks (use your unit skill or move).
Synergies[ | ]
 Squire-Apprentice + Ghoul [ | ]


The Apprentice uses Heal ![]() on Squire, restoring 100 Health, and then the Ghoul Feasts
on Squire, restoring 100 Health, and then the Ghoul Feasts ![]() on the Squire, turning the Squire's 50 Health into 140 Health for the Ghoul. With this great Tier 1 synergy, you will effectively help your frontline last longer and soak up more damage for your team.
on the Squire, turning the Squire's 50 Health into 140 Health for the Ghoul. With this great Tier 1 synergy, you will effectively help your frontline last longer and soak up more damage for your team.
Ghoul + Squire [ | ]
Works very effectively especially with Apprentice healing Squire. You can also adjust your strategy and focus on snowballing your Ghoul. (See Stack That Ghoul
Roles[ | ]

Melee[ | ]
Expendable! Make Basic Attacks ![]() your best friend! Your enemy squishies annoyances!
your best friend! Your enemy squishies annoyances!
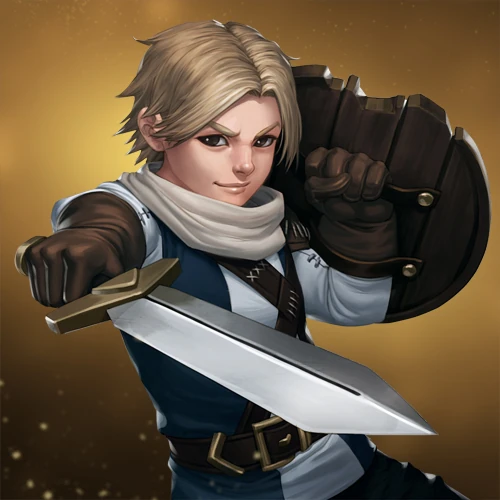
Squires[ | ]
Your basic melee tank unit. Squires are extremely mobile and can harass well due to their fast energy recovery. Use them to hold the Energy Squares ![]() on the floor for your ranged, deny Energy Squares
on the floor for your ranged, deny Energy Squares ![]() from enemy units (you can utilize the Squire's Pushback
from enemy units (you can utilize the Squire's Pushback ![]() for this as well), run up to and harass with Basic Attacks
for this as well), run up to and harass with Basic Attacks ![]() or Rock Toss
or Rock Toss ![]() the enemy squishies (though try to always be able to use Basic Attacks
the enemy squishies (though try to always be able to use Basic Attacks ![]() since they are more energy efficient), block paths to keep the enemy melee from reaching your own squishies, and, of course, a health resource for your Ghoul's Feast
since they are more energy efficient), block paths to keep the enemy melee from reaching your own squishies, and, of course, a health resource for your Ghoul's Feast ![]() . Try to place Squires adjacent to your Ghoul whenever possible/ needed and Heal
. Try to place Squires adjacent to your Ghoul whenever possible/ needed and Heal ![]() when it needs more health for your Ghoul or if the enemy is wasting attacks on it.
when it needs more health for your Ghoul or if the enemy is wasting attacks on it.
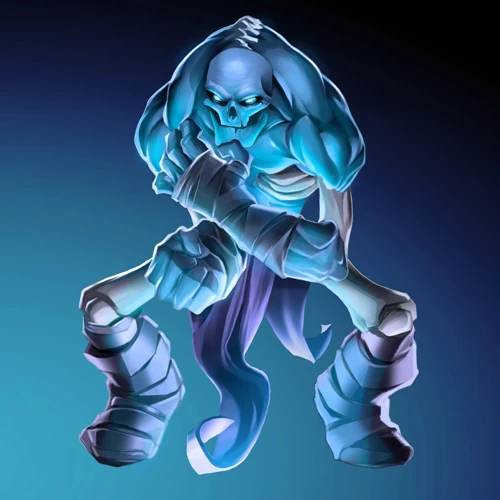
Ghoul[ | ]
Your basic melee fighter unit. Ghouls do more damage than Squires and can strengthen themselves with Soul Cut ![]() at the cost of lesser health, defense and energy recovery. Since your Ghoul has the same amount of maximum movement (3 squares) as your Squires, they function in almost the same way (again, harass with your Basic Attacks
at the cost of lesser health, defense and energy recovery. Since your Ghoul has the same amount of maximum movement (3 squares) as your Squires, they function in almost the same way (again, harass with your Basic Attacks ![]() whenever it is useable!) with the only big difference being that the Ghoul has self healing through Feast
whenever it is useable!) with the only big difference being that the Ghoul has self healing through Feast ![]() . Use your Ghoul as you use your Squires while also Feasting
. Use your Ghoul as you use your Squires while also Feasting ![]() to heal itself as it soaks up more damage. Only Heal
to heal itself as it soaks up more damage. Only Heal ![]() when Feast
when Feast ![]() is not useable (not enough energy/ no adjacent friendly unit) and you think the Ghoul might be taken out in the next 1 or 2 strong hits.
is not useable (not enough energy/ no adjacent friendly unit) and you think the Ghoul might be taken out in the next 1 or 2 strong hits.
Ranged[ | ]
Not as expendable as your Melee! Energy Tiles ![]() and Elevated Terrain
and Elevated Terrain ![]() are their best friend! Make Ultimate Attacks your best friend! Your enemy squishies demise!
are their best friend! Make Ultimate Attacks your best friend! Your enemy squishies demise!
Vagabonds[ | ]
Your basic physical damage ranged unit. Vagabonds are more mobile than your Apprentice which makes them more expendable than your Apprentice (when they are slain, they can get back to attack range or Energy Squares ![]() faster than the Apprentice). Get your Vagabonds on elevated terrain
faster than the Apprentice). Get your Vagabonds on elevated terrain ![]() especially if it is an elevated Energy Square
especially if it is an elevated Energy Square ![]() +
+![]() ! Focus your Killshot
! Focus your Killshot ![]() on the enemy squishies, especially on their magical damage sources. Use (mainly for energy efficiency) Basic Attacks
on the enemy squishies, especially on their magical damage sources. Use (mainly for energy efficiency) Basic Attacks ![]() to finish off enemies if your Killshot
to finish off enemies if your Killshot ![]() becomes overkill. Dodge
becomes overkill. Dodge ![]() when your Vagabond is being focused by the enemy.
when your Vagabond is being focused by the enemy.
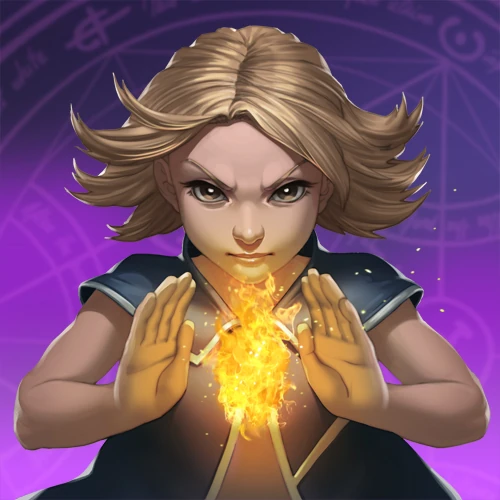
Apprentice[ | ]
Your basic magical damage ranged/ support unit. Your Apprentice is the least mobile in this group so try to get it on an Energy Square ![]() and keep it alive. Like your Vagabonds, the Apprentice benefits greatly from elevated terrain! Focus your Fire Bolt
and keep it alive. Like your Vagabonds, the Apprentice benefits greatly from elevated terrain! Focus your Fire Bolt ![]() on the enemy squishies, especially on their physical damage sources. Use (mainly for energy efficiency) Basic Attacks
on the enemy squishies, especially on their physical damage sources. Use (mainly for energy efficiency) Basic Attacks ![]() to finish off enemies if your Fire Bolt
to finish off enemies if your Fire Bolt ![]() becomes overkill. Heal
becomes overkill. Heal ![]() your units when they are dangerously low or have less than 50% health with your standard priority (take how much energy the unit has stored into account as well) from highest to lowest being: Apprentice, Vagabond, Squire, Ghoul.
your units when they are dangerously low or have less than 50% health with your standard priority (take how much energy the unit has stored into account as well) from highest to lowest being: Apprentice, Vagabond, Squire, Ghoul.
TL; DR (In General)[ | ]
Whatever assortment of Champs you use in your Army, focus squishies and threats to your own squishy Champs. Protect your damage dealers: keep them alive. Be aware and have knowledge of positioning, health, energy, attack range, move range and the Champs in play (know yourself, know your enemy). Take advantage and control the map. Have fun playing. =)
Contributors[ | ]
Vargrax (talk) 17:47, 12 August 2013 (UTC)