Tier 1 Terror
| ||||||||||||
|---|---|---|---|---|---|---|---|---|---|---|---|---|
|


Changelog[ | ]
September 3, 2013 - Guide created
September 14, 2013 - Guide updated to address changes to Sorceress in the 9/13 patch
Introduction[ | ]
"Unless I have 6 tier 2 units I'm going to lose in pvp!" - new player who recently lost to spin-to-win
"Why would you use a tier 1 unit when you can just upgrade it?" - player going off his intuition
"I bought all the most expensive units in the game, I'm going to dominate now" - rich guy / grinder
If you're a player who's going off your gut, your gut is telling you to fully upgrade everything and then you'll be doing #tonsofdamage. And 90% of the time, you'll be right; why would a developer make you spend more time/money to make your existing units worse? Well in this particular game spending QP or BP to upgrade your units does two things: increase stats and specialization. And both of those things sound pretty good. Your units will overall have more health, more energy, more defenses, and more damage. However, by doing this sometimes you sacrifice flexibility and this composition is designed to utilize two rarely used tier 1 units and to explain why they can be better than their tier 2 equivalents.


The Tier 2 Units: Explanation[ | ]
Knight/Skylancer[ | ]


These guys are your controllers. Your goal with the Knight is to control the middle of the map, Knockback ![]() the enemy middle unit, and to soak up the initial burst of damage. The Skylancer is used to flank the enemy and pull high priority targets (nukers, buffers) off of higher elevation with Harpoon
the enemy middle unit, and to soak up the initial burst of damage. The Skylancer is used to flank the enemy and pull high priority targets (nukers, buffers) off of higher elevation with Harpoon ![]() to allow your nukers to burst them down.
to allow your nukers to burst them down.
Reaper[ | ]


The goal of the Reaper is, obviously, to last hit enemy units with its 5 tick: Enthrall ![]() . However, the Reaper is also deceptively tanky compared to other mages, as it has almost double the physical and technical resistance of the Sorceress. The Reaper's 4 tick: Consume
. However, the Reaper is also deceptively tanky compared to other mages, as it has almost double the physical and technical resistance of the Sorceress. The Reaper's 4 tick: Consume ![]() heals for 200 damage, easily throwing a wrench in the opponent's last hit strategy. Keep in mind that Consume deals 100 true damage to the target, so cast Consume
heals for 200 damage, easily throwing a wrench in the opponent's last hit strategy. Keep in mind that Consume deals 100 true damage to the target, so cast Consume ![]() on a unit far in the back line, within range of a quick Apprentice Heal
on a unit far in the back line, within range of a quick Apprentice Heal ![]() , or a tank (i.e. your Knight).
, or a tank (i.e. your Knight).
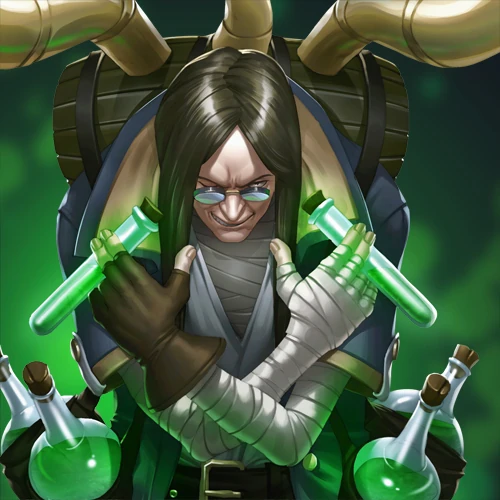
Alchemist[ | ]

Your Alchemist is going to be the unit that will set up kills for your Reaper and your Apprentice. With the Oil Burst ![]() , fire damage will be amplified and cause additional burning damage over time (100 Technical damage). Cast the Apprentice's Fire Bolt
, fire damage will be amplified and cause additional burning damage over time (100 Technical damage). Cast the Apprentice's Fire Bolt ![]() and the Reaper's Enthrall
and the Reaper's Enthrall ![]() at the appropriate time to get the last hit and summon a Thrall.
at the appropriate time to get the last hit and summon a Thrall.
The Controversy[ | ]


Now, at this point in the guide many of you are probably wondering "What is so good about the Wilder when you can use the Planter or the Archer instead?" or "Why would you use an Apprentice when you could have a Sorceress or a Cleric?" And the arguments supporting the use of any of these tier 2 units are plenty. The Archer has greater debuff than the Wilder (or does it?). The Planter's bush is stronger than the Wilder's. The Sorceress deals more damage than the Apprentice. The Cleric can shield your units while the Apprentice cannot. These points are all valid, but for the sake of greater flexibility, I have chosen to sacrifice specialization and higher stats. And after considering the following points, perhaps you might do the same.
Wilder[ | ]
Until recently I only viewed the Wilder as hedgethrowing kill fodder for my Corruptor or Reaper. However, upon closer examination I learned a couple eye opening facts about the Wilder which makes it an incredibly viable champ in almost any squad.
1. The Wilder's basic attack deals Technical damage[ | ]
That's right, this little, furry, nature-loving, tree-hugging creature does the same type of damage by throwing a seed that the high tech Alchemist does by throwing a vial of acid. But now Straw-man-dumb-guy might say "Whoop-dee-doo, it does Technical damage, that doesn't make the Wilder viable". Well that's where you're wrong dummy. Due to the low Technical defense of almost every single unit (other than units that deal Technical damage themselves), the Wilder's 55 Technical damage seed deals nearly the same amount of real damage as the Knight, Corruptor, Pestilent, and Skylancer does with their 70 Physical damage basic attack. Against a Squire, the Wilder's basic attack deals 50 damage and the Knight deals 53 damage. In fact, the Alchemist ends up dealing more real damage with its 60 Technical damage vial than any melee champ does with its basic attack (besides the Critter with its 80 Physical damage basic attack).
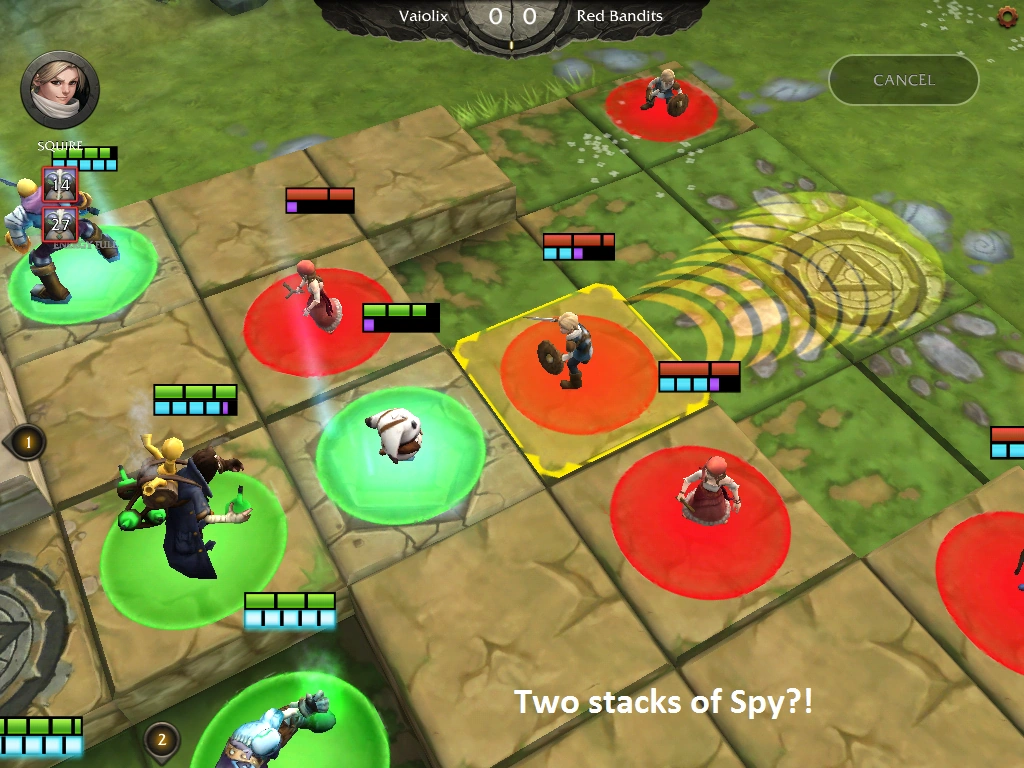
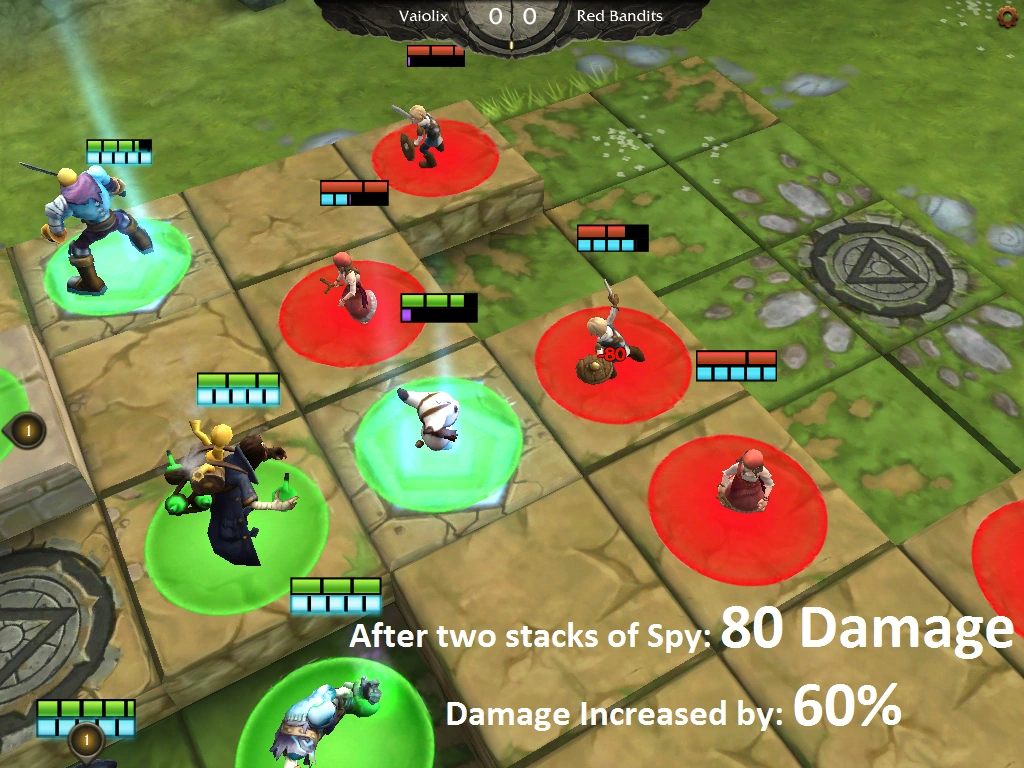
2. The Wilder's AOE debuff can STACK[ | ]
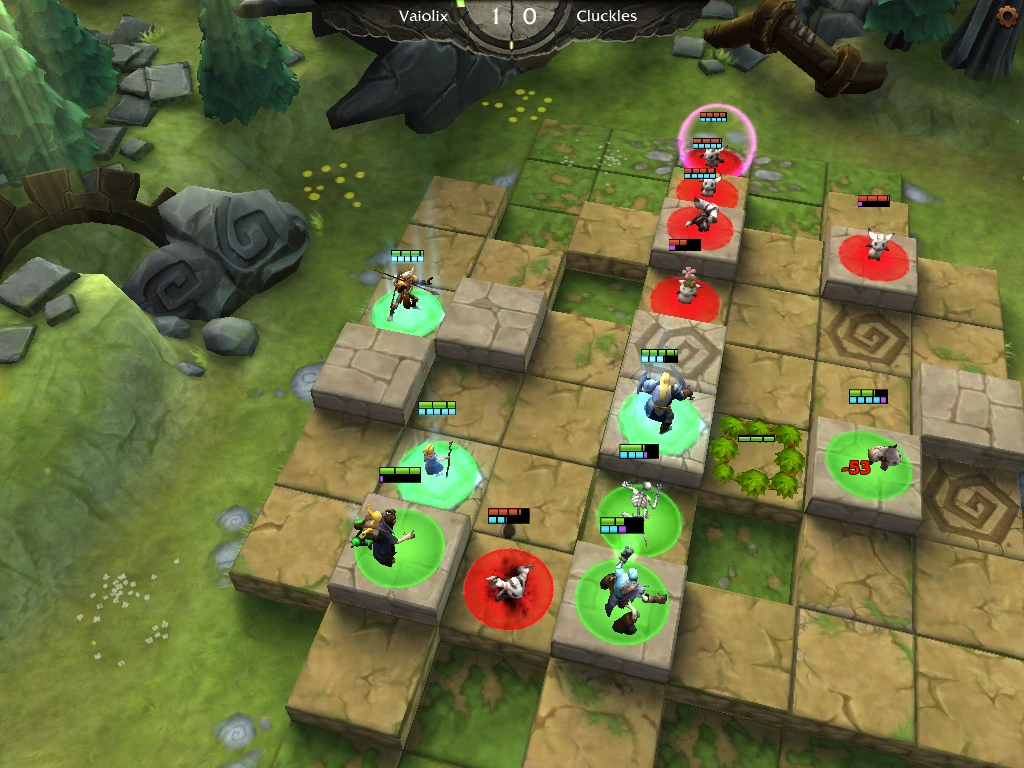
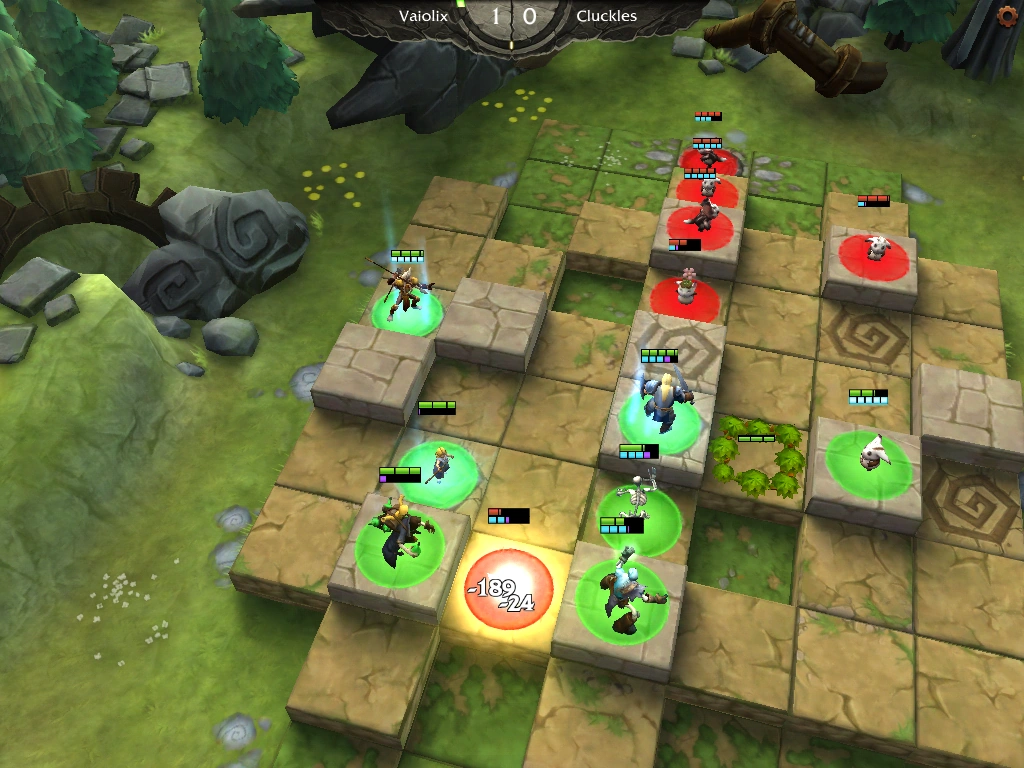
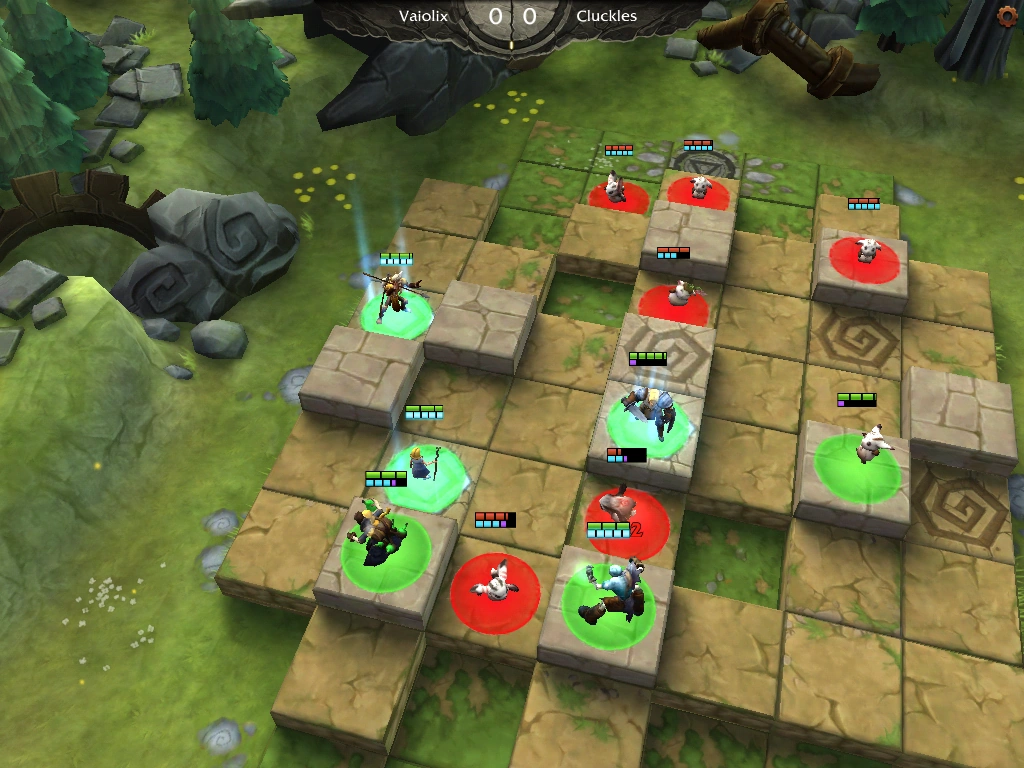
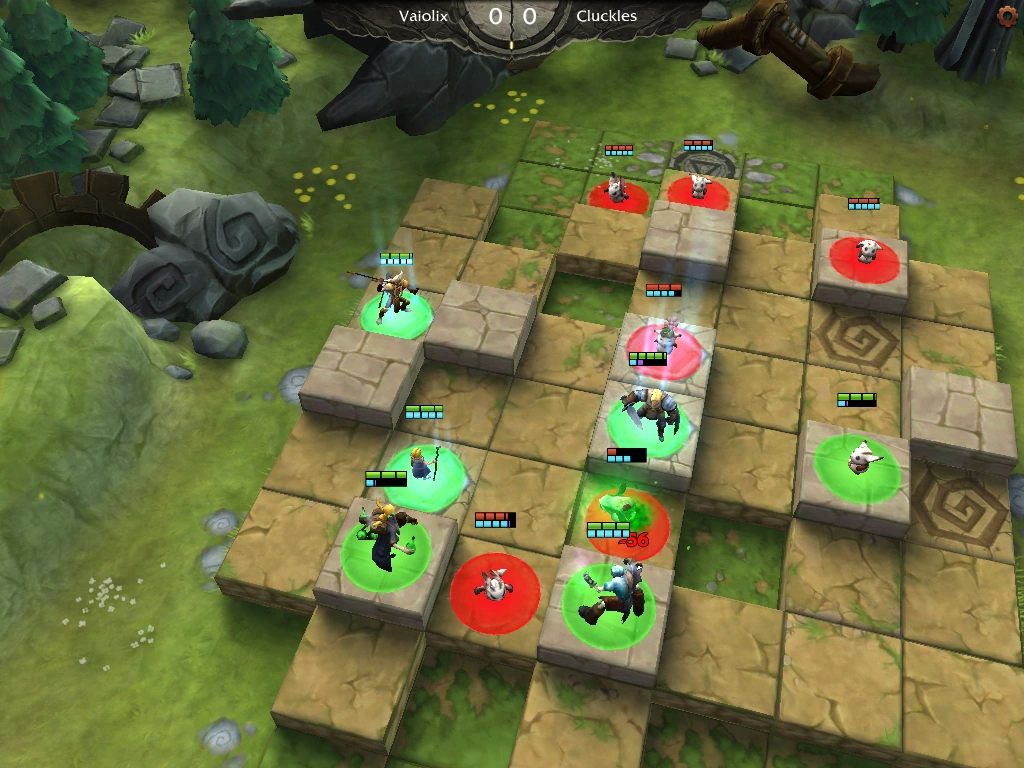
If you weren't convinced by the previous section that you should include the Wilder in your squad; this piece of information should. Not only does the Wilder's Spy ![]() debuff multiple units (up to 3 in a line), this debuff can stack on itself. Additionally, it can stack even if it is casted by the same unit. If you're doing the math in your head, that means that for a good 14 seconds, all damage dealt to any of the debuffed units will be amplified by 60%. Here is a series of pictures if you aren't yet convinced that this works.
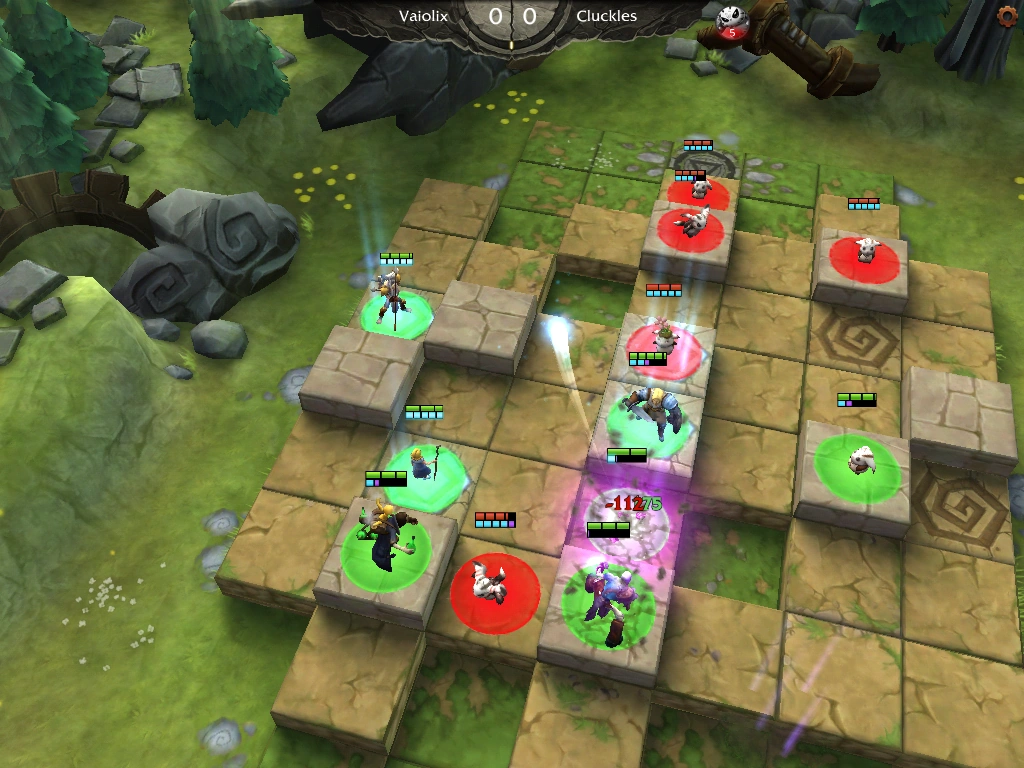
debuff multiple units (up to 3 in a line), this debuff can stack on itself. Additionally, it can stack even if it is casted by the same unit. If you're doing the math in your head, that means that for a good 14 seconds, all damage dealt to any of the debuffed units will be amplified by 60%. Here is a series of pictures if you aren't yet convinced that this works.
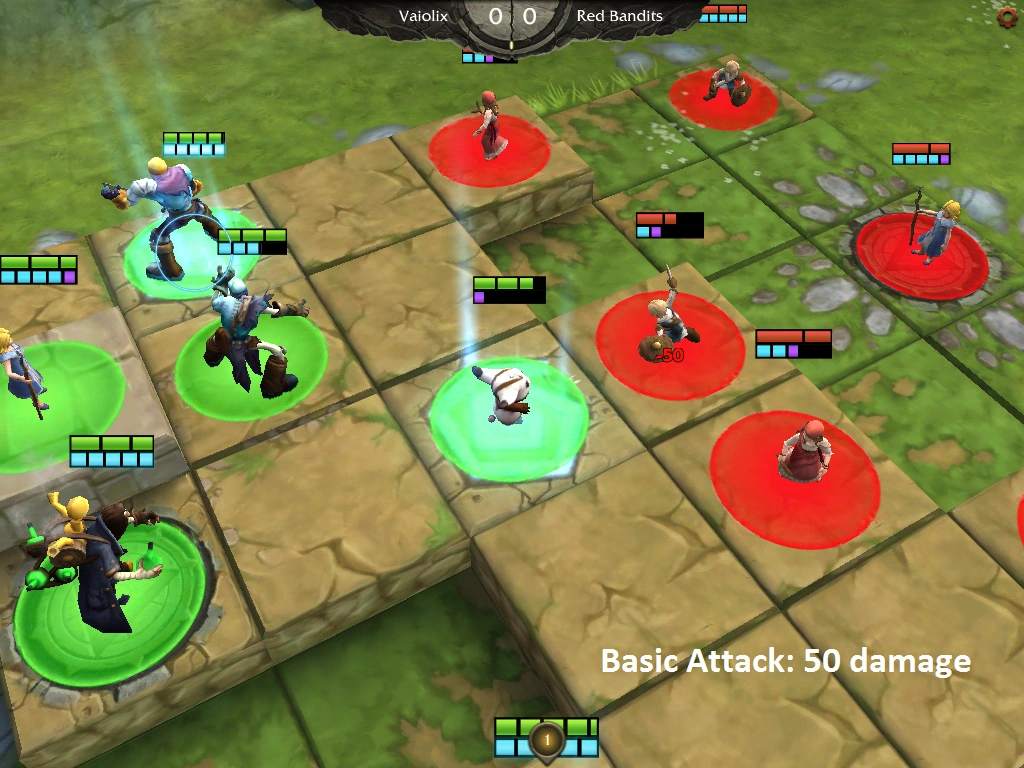

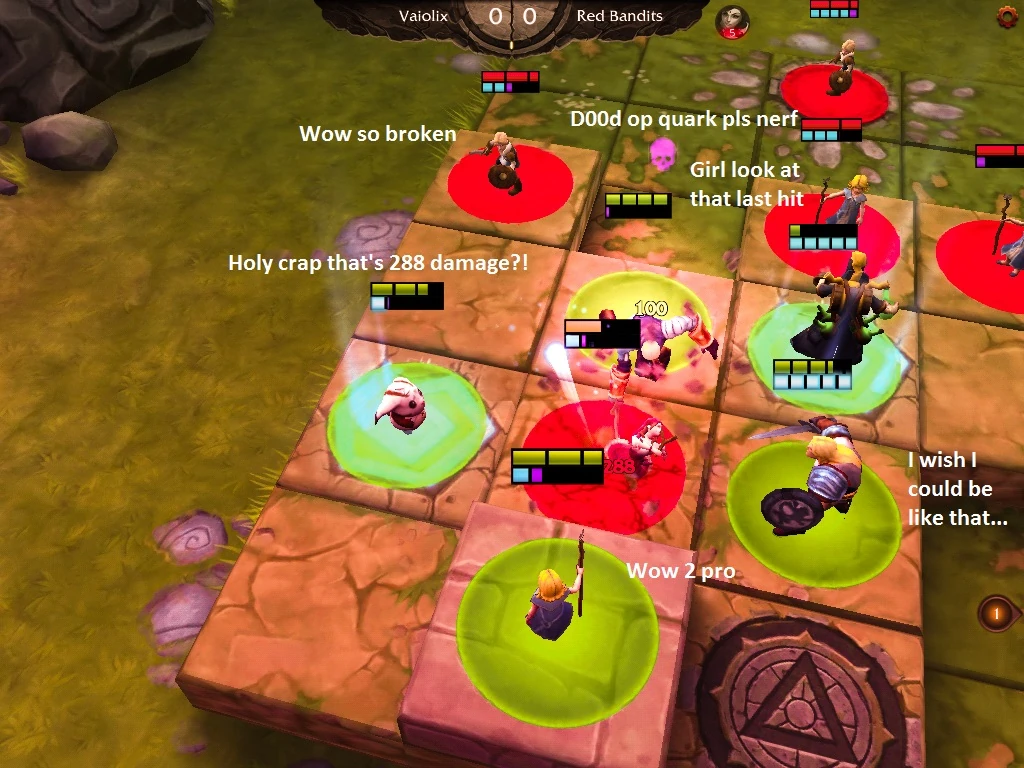
What does this mean for you? Well, your wimpy 0 stack Corruptor can stop looking like this:

And start looking like THIS:
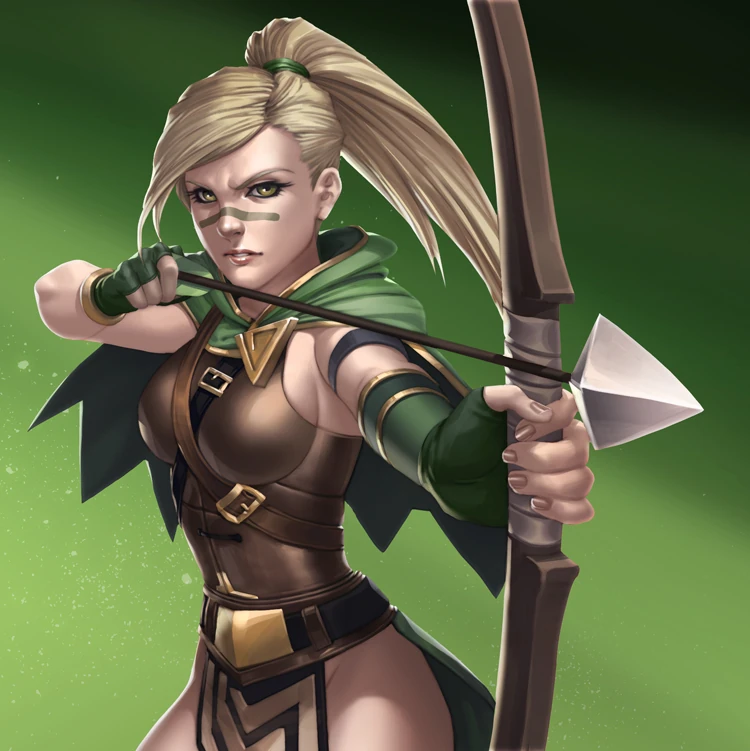
Why would you want a Planter with no debuff or an Archer with a weaker debuff and no technical damage when you could have the Wilder?
Apprentice vs. Cleric[ | ]
I know a lot of you out there love your Clerics, but I'm going to break it to you right now: unless you're saving your damage dealers with clutch heals and blocking a ton of incoming damage with your Holy Shield ![]() , your Cleric is dragging your team down. Here are some reasons why your Cleric isn't helping you as much as you think it is.
, your Cleric is dragging your team down. Here are some reasons why your Cleric isn't helping you as much as you think it is.
1. Your Cleric deals 0 damage[ | ]
This might be somewhat overstating it, but the fact is that mages deal basically 0 damage with their basic attack. While most units have around 70 damage on their basic attack in either physical or technical damage, mages deal a paltry 40 damage. In addition to that, Clerics have further decreased damage, dealing a pitiful 35 damage on their basic attack. In terms of damage/healing, the Cleric's 4 tick Replenish ![]() heals for 2x per tick compared to the damage the basic attack deals (25 health/tick vs. ~12 damage/tick).
heals for 2x per tick compared to the damage the basic attack deals (25 health/tick vs. ~12 damage/tick).
2. Your Cleric's shield can be easily wasted[ | ]
The Cleric's Holy Shield ![]() is an incredibly strong buff: for just 5 ticks of energy you can shield a unit and increase its defense by 50 in every stat! But the pitfall with this skill is that in terms of damage, in order to compare with the Sorceress' Fireball
is an incredibly strong buff: for just 5 ticks of energy you can shield a unit and increase its defense by 50 in every stat! But the pitfall with this skill is that in terms of damage, in order to compare with the Sorceress' Fireball ![]() , it needs to prevent roughly 140 damage in order to be useful. More often than not, the target of the Holy Shield
, it needs to prevent roughly 140 damage in order to be useful. More often than not, the target of the Holy Shield ![]() will give the opponent a huge red flag to avoid targeting that unit which wastes the shield (and leaves your Cleric open to be bursted down). In all other cases, the target of the Holy Shield
will give the opponent a huge red flag to avoid targeting that unit which wastes the shield (and leaves your Cleric open to be bursted down). In all other cases, the target of the Holy Shield ![]() ends up being the Cleric itself which begs the question: Why are you trying to make a squishy unit tanky if you could instead have run a tanky unit in the first place? The Cleric's Holy Shield
ends up being the Cleric itself which begs the question: Why are you trying to make a squishy unit tanky if you could instead have run a tanky unit in the first place? The Cleric's Holy Shield ![]() is incredibly useful but it is a single time, single target skill which, if you end up playing against more versatile comps, will end up detracting from the team rather than bolstering it.
is incredibly useful but it is a single time, single target skill which, if you end up playing against more versatile comps, will end up detracting from the team rather than bolstering it.
3. Your Cleric's heal heals for the same amount as the Apprentice[ | ]
The one major advantage the Cleric has over the Apprentice is that its heal has 1 additional range which can work wonders. However, in terms of actual healing ability it heals the same amount as the Apprentice's heal which means that the 1 range deficit of the Apprentice's heal can be made up with pre-planning and positioning.
Will there be times that the Cleric is better?[ | ]
Yes, against certain compositions the Cleric will be a better idea than an Apprentice. If the opposing team has a tanky mid champ with equally tanky flankers, generally you will end up losing the middle if you do not run a Cleric instead of the Apprentice for the Holy Shield ![]() . Also, a Cleric, when used properly, can turn a game around by stopping an enemy's push and help you regain map control. For me, my general rule of thumb is that if it is not possible to take down a single unit with the Skylancer Harpoon
. Also, a Cleric, when used properly, can turn a game around by stopping an enemy's push and help you regain map control. For me, my general rule of thumb is that if it is not possible to take down a single unit with the Skylancer Harpoon ![]() -> Alchemist Oil Burst
-> Alchemist Oil Burst ![]() -> Apprentice Fire Bolt
-> Apprentice Fire Bolt ![]() combo, then a Cleric will work better than an Apprentice. But in general, the Apprentice will prove to be more beneficial than the Cleric because of the simple fact that Damage gets kills, not heals.
combo, then a Cleric will work better than an Apprentice. But in general, the Apprentice will prove to be more beneficial than the Cleric because of the simple fact that Damage gets kills, not heals.
Conclusion[ | ]
The Apprentice, while lacking in stats and a shorter range heal, has the versatility to act as both support and as a nuker which can allow you to quickly react to the changing battlefield. By specializing into a Cleric, you eliminate one damage dealer and the rest of your units have to make up for that lost damage.
Apprentice vs. Sorceress[ | ]
Why not run a Sorceress instead?[ | ]
The Sorceress is extremely overrated. The Sorceress' 5 tick ![]() does a mere 10 more damage than the Apprentice's 5 tick
does a mere 10 more damage than the Apprentice's 5 tick ![]() . But the greatest downside is that the Sorceress' 4 tick Spirit Shield
. But the greatest downside is that the Sorceress' 4 tick Spirit Shield ![]() lasts a short 3 ticks (27 seconds) and shields for barely more than the Apprentice and Cleric can heal for (A 120 health shield vs. a 100 health heal). In addition, the Spirit Shield
lasts a short 3 ticks (27 seconds) and shields for barely more than the Apprentice and Cleric can heal for (A 120 health shield vs. a 100 health heal). In addition, the Spirit Shield ![]() has a cast range of 2, which is the same tiny range as the Apprentice's Heal
has a cast range of 2, which is the same tiny range as the Apprentice's Heal ![]() . Basically, swapping the Apprentice for the Sorceress leaves you with a little more damage and 0 healing ability. So don't do it.
. Basically, swapping the Apprentice for the Sorceress leaves you with a little more damage and 0 healing ability. So don't do it.
Update: With the new cast range of 3 for the Sorceress' shield and a recent reversion of the amount of damage the shield can absorb, the Sorceress may look like a plausible choice. Keep in mind though that your units still will have no way to heal themselves (aside from the Reaper). Expect to be forced to lose some units, especially the Knight and Skylancer which will both take huge beatings throughout the match. If you are forced to give up these units, do it in a way that wastes the enemy's energy by chasing them around the map or in a way that does not concede control of any energy tiles (place a Wilder's Weed ![]() on that energy tile or shift your backline units up).
on that energy tile or shift your backline units up).
Strategies[ | ]
We've analyzed the units that make up this squad. Now let's talk strategy.
Basic Tactics[ | ]
These tactics are commonly used synergies that almost everyone will expect. They often take a lot of time to set up but are useful and effective nonetheless.
Alchemist and Apprentice syngergy[ | ]
Alchemist Oil Burst ![]() and Apprentice Fire bolt
and Apprentice Fire bolt ![]() ? Say hello to a 180 Magic damage nuke with an additional 100 Technical damage over time. Oil Burst
? Say hello to a 180 Magic damage nuke with an additional 100 Technical damage over time. Oil Burst ![]() amplifies any fire damage by 50% so casting a Fire bolt
amplifies any fire damage by 50% so casting a Fire bolt ![]() onto a unit without an Oil Burst
onto a unit without an Oil Burst ![]() debuff almost seems like a waste.
debuff almost seems like a waste.


Wilder and Skylancer/Knight synergy[ | ]
See that smug Cleric standing on that energy tile using all of its energy to heal its allies? Throw down a Wilder's Weed ![]() and tell your Skylancer to Harpoon
and tell your Skylancer to Harpoon ![]() that mage into a thorny trap. In addition to removing all energy from that unit, the Weed
that mage into a thorny trap. In addition to removing all energy from that unit, the Weed ![]() deals an additional 40 Technical damage per tick to the trapped unit, giving you the opportunity to burst her down at your own leisure.
deals an additional 40 Technical damage per tick to the trapped unit, giving you the opportunity to burst her down at your own leisure.
Advanced Tactics[ | ]
Alchemist and Wilder synergy[ | ]
Your enemy might think that his Bandit in that center tile is in no threat because only your Knight is adjacent to it. Not so fast, with the Alchemist's and Wilder's basic attacks, you can deal a total of 115 Technical damage which will round out to about 100 real damage. Add a Knight's Knockback ![]() and that Bandit is ripe for Reaping
and that Bandit is ripe for Reaping ![]() . You can also dish out consistent damage by placing your Alchemist in the back and your Wilder on the right side of the map and throw basic attacks at the enemy's backline (and force their Cleric to heal the back line instead of the front!).
. You can also dish out consistent damage by placing your Alchemist in the back and your Wilder on the right side of the map and throw basic attacks at the enemy's backline (and force their Cleric to heal the back line instead of the front!).


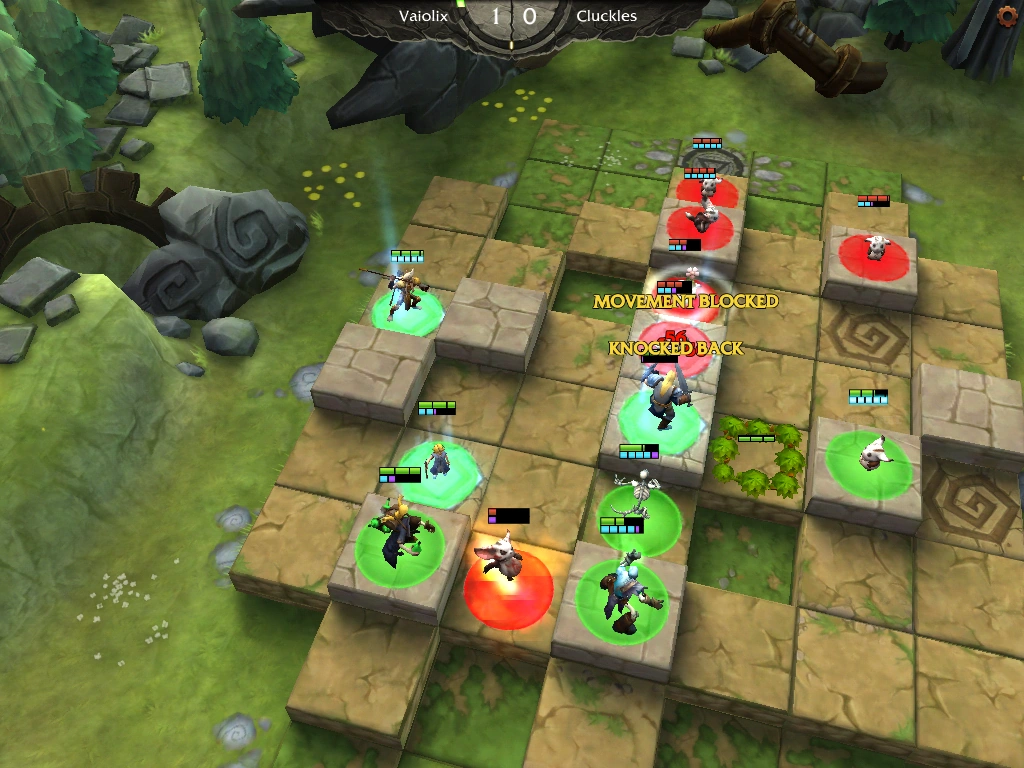
Knight and Skylancer synergy[ | ]
The Knight and Skylancer don't mess around. They choose who gets to stay on the energy tiles and who has to leave. Use your Knight's Knockback ![]() and your Skylancer's Harpoon
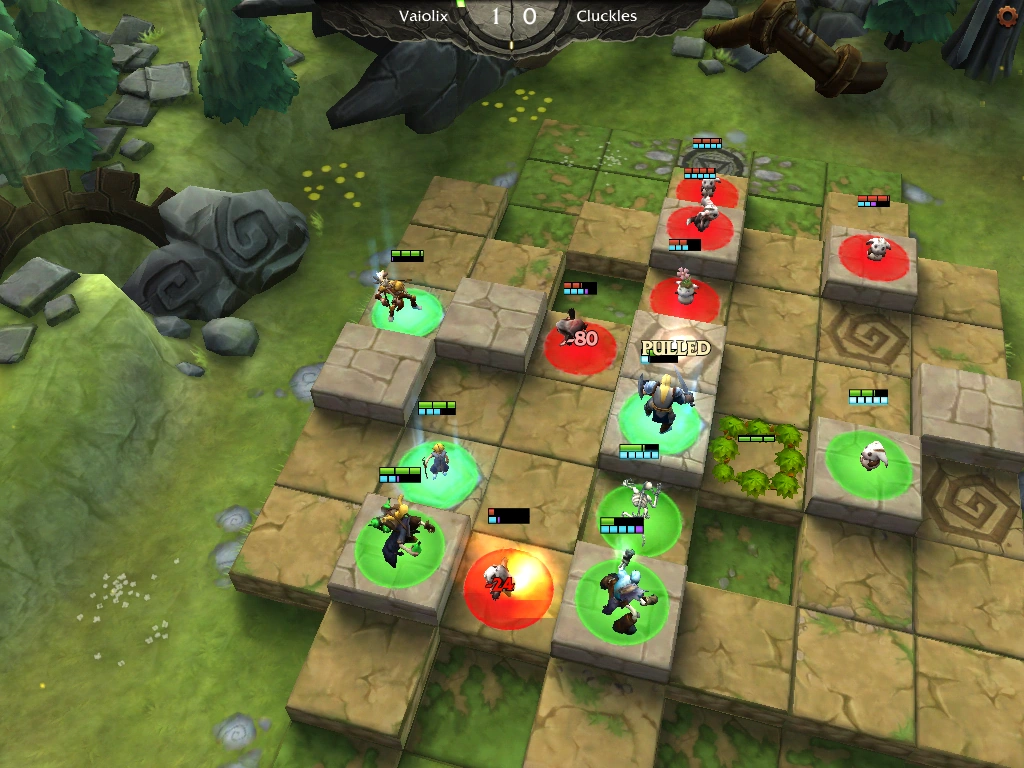
and your Skylancer's Harpoon ![]() back to back in order to waste your enemy's time and energy walking back to the tile they came from. Start by knocking back
back to back in order to waste your enemy's time and energy walking back to the tile they came from. Start by knocking back ![]() the enemy middle unit for 140 physical damage and a stun then Harpoon
the enemy middle unit for 140 physical damage and a stun then Harpoon ![]() them when they move back into range of your Skylancer. At this point that unlucky unit is likely out of energy and open for your Reaper and Alchemist to pick up a kill.
them when they move back into range of your Skylancer. At this point that unlucky unit is likely out of energy and open for your Reaper and Alchemist to pick up a kill.


Distractions and Baiting[ | ]
Distractions are a great way to keep your enemy unaware of your true intentions. If your Alchemist's and Wilder's basic attacks attacks are up and your Reaper has 5 ticks of energy, you can use your Skylancer or Knight to use their 5 ticks to deal heavy damage to a unit on the other side of the map, baiting out the enemy Cleric's or Apprentice's heal and leaving them with no way to protect their Archer or Engineer.
Distractions can also involve unit movement. By moving a low health unit away from the enemy front line, you can coax the enemy backline to move within range of your ranged damage dealers. This is a very easy way to continue making your Reaper useful after you have controlled the middle of the map without moving it away from its original position.
General Tips[ | ]
Here are a couple tips that apply to any composition. All you need is some quick micro and some pre-planning
Dodging[ | ]
Up until now, you may have dodged abilities only by a stroke of luck. However, with practice, you can turn this aspect of the game into a strategy and not just a fluke. Pay close attention to the enemy's Bandits, Alchemists, Reapers, and Corruptors. These are the units that cannot deal damage with their 4 ticks and have slow casting animations for their 5 ticks. By moving 2 spaces away from the tile a unit is currently standing on when you see any of the units above charging their 5 tick, you can almost always reliably dodge that 120-150 damage that would otherwise deal a heavy blow to your unit.
Sacrificing[ | ]
Sometimes you are in a position when the enemy Alchemist has just thrown an Ubernade ![]() and you don't want to / can't move your Apprentice away from it. Move your Knight, Alchemist, or Thrall on top of that Ubernade
and you don't want to / can't move your Apprentice away from it. Move your Knight, Alchemist, or Thrall on top of that Ubernade ![]() to soak up that damage for your mage. Your Apprentice can even thank that unit later with a Heal
to soak up that damage for your mage. Your Apprentice can even thank that unit later with a Heal ![]()
Positioning[ | ]
Notice that the enemy is running 2, 3, or 6 Bandits? Instead of lining up your units like you always do, position your units so that your tankiest units are on the energy tiles adjacent to the Bandits and keep every other unit diagonal to them. If they decide to harass you with basic attacks instead of repositioning, you will have won the damage game. If they decide to use their energy to shield up themselves, use a charged spear from your Skylancer or a basic attack from your Wilder to pop that 4 tick shield with a 3 tick basic attack. This is true for other compositions as well, including Axeman comps or Engineer comps. Position your units so that you will take as little AoE damage as possible.
Final Thoughts[ | ]
If you've reached this part of my guide, I'd like to thank you for reading through it (or if you just scrolled down to look for a tl;dr... well I guess you'll find it here). These two units are too often overlooked and this guide was meant to be more of a strategy guide and less of a squad composition or a particular build. While there are many squads where a Cleric or an Archer will fit better than the Apprentice or Wilder, don't rule out these two tier 1 terrors (trademarked) (not really).
My in-game name is Vaiolix, but my username on the forum/Line/wiki is Vaiolis. Shoot me a message if you have any questions or comments.
Contributors[ | ]
Vaiolis (talk) 22:50, 3 September 2013 (UTC)